My Favorite Low Carb Recipe Websites

Ok, so I’ve been on Trim Healthy Mama for almost 2 years now and will continue it for the rest of my life. Why you may be asking? Well, I no longer have knee pain. I have more energy. Belly bloat is gone. Plus, I lost over 20 pounds. So, Why wouldn’t I keep eating this way!

Now on to websites. I get tired of the same food day in and day out so, I like to try new recipes especially, dessert recipes. My favorite dessert recipe websites are All Day I Dream About Food  and I Breathe I’m Hungry. Gotta love the names! I have never had a bad recipe from either of these sites and that is really important when baking low carb because some of the ingredients can be a bit pricey. I look at it this way, do I want to spend the extra money on what is good for my body or on Doctor bills. I prefer good yummy wholesome food so, I’ll pay the extra money for the occasional treat. Both of these sites also include savory recipes, but I have to admit I haven’t tried any yet so I can’t testify to their worthiness. I will say though if their savory dishes are as good as their desserts you do not want to miss out. I’ll update you later when I make that attempt. Happy Baking!

By the way some of my favorite recipes from All Day I Dream About Food are:

Here is one of my favorites from I Breathe I’m Hungry:

Cinnamon Squares Cupcakes

Alright all you cupcake lovers out there….All who watch cupcake wars and think I could do that! Easier said than done right. I decided to make this delicious looking cupcake for my church’s bake sale and how can you go wrong with a cupcake that gives a nod to cinnamon toast crunch cereal. It is delightfully moist, not overly sweet, cinnamon goodness. I love cinnamon squares! It is probably the only kid cereal I like besides Koala Crunch a take on chocolate rice krispie cereal but organic. Still not good for you though so don’t let organic fool you it still empty calories.

I of course got the recipe off Pinterest from Your Cup of Cake Blog. All I have to say is good job and its a keeper. Her recipe is below or you can click on the blog link for a printable version.


Cinnamon Cake:
3 eggs
1/3 cup oil
¾ cup milk + 1 tablespoon white vinegar (let sit for 5 minutes) or 3/4 cup buttermilk
1 teaspoon vanilla extract
¾ cup sour cream
Vanilla Cake Mix (not white cake mix)
1 ½ teaspoon cinnamon
Cinnamon Toast Crunch Buttercream:
8 oz cream cheese, softened
½ cup butter, softened
1 teaspoon vanilla
3 cups powdered sugar
2/3 cup Cinnamon Toast Crunch powder
(Put in food processor and grind and then sift out 2/3 cup)
1. Preheat oven to 350 degrees and line pans with 20-22 cupcake liners.
2. In a large bowl, gently combine eggs, oil, buttermilk and vanilla.
3. Mix in sour cream.
4. Add cake mix and cinnamon and mix until smooth.
5. Fill cupcake liners ¾ full and bake for 15-18 minutes, or until an inserted knife comes out clean.
6. Buttercream: Beat cream cheese and butter until fluffy. Add Cinnamon Toast Crunch powder. Add vanilla and powdered sugar. Adjust the consistency using milk if it is too thick.
7. Pipe onto cooled cupcakes and top with cinnamon sugar and Cinnamon Toast Crunch squares.
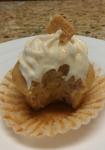
Here’s a picture of how mine turned out minus the cinnamon sugar mixture.

It even looks good with a bite taken out of it!

Best Pancakes Ever

image

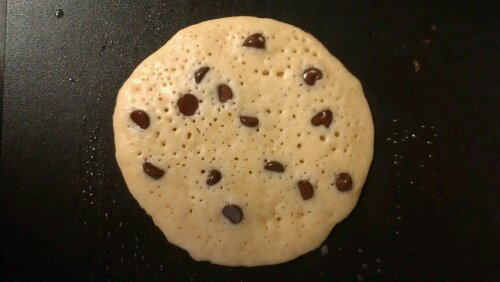
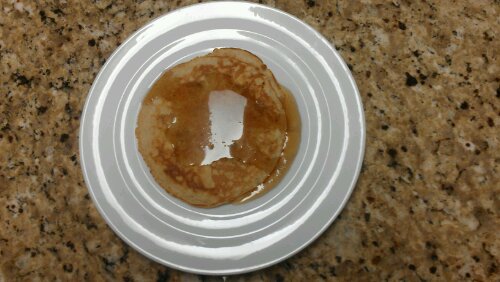
This is a recipe I found on Pinterest from A Golden Afternoon’s Blog with a few adaptations. It makes the most delicious pancake plus it looks and almost taste like a chocolate chip cookie. It is lite and fluffy not heavy like some other pancake recipes or box mixes. We like to add chocolate chips, blueberries, or even a little cinnamon in ours of course not all three together but that may be good as well. The great thing about pancakes is you can use the base recipe and add whatever extras you want.

Best Pancakes Ever, Adapted from A Golden Afternoon
2 cups flour
2 T granulated sugar
1 tsp baking powder
½ tsp baking soda
2 cups milk (plus 2 tsp vinegar)*
2 eggs
¼ cup sour cream
1 tsp of vanilla extract
1 tsp cinnamon (optional)
3 T butter, melted and cooled a bit
butter or oil for the pan
Mix the dry ingredients together. In a separate bowl, whisk the milk/vinegar combo, eggs, sour cream, and melted butter. Pour the wet ingredients into the dry and stir until just combined…it’s ok if there are a few lumps (resist the stirring!). Let it sit while your pan heats up.

You can follow the above but I usually just throw everything in together except the butter. I incorporate the wet and dry then once mixed add the butter because by then it has cooled enough so that it won’t cook your eggs.

Hot pans make the best pancakes 🙂 I prefer butter for my pancakes because I think it tastes Awesome the best perfect irresistible pretty good, but oil is totally cool too. Just grease your pan either way and cook until the bubbles start to pop . Flip and cook 1 minute or so more.
Remember to grease your pan in between batches.
*Normally buttermilk is a great ingredient in pancakes, but who really has buttermilk when you need it for a spontaneous Saturday morning pancake session? The old trick is to use 1 tsp of vinegar for every 1 cup of milk. The milk “turns” a bit from the vinegar and ends up pretty darn close to buttermilk.

image

Teacher Appreciation Week

As all you know with kids in school we are fast approaching teacher appreciation week (the first week of May). I came upon this really cute idea online and since it was economical and didn’t take much time to personalize it was the project for me. My kids each have two teachers and a director in their preschool so I had to find something that wasn’t going to break the bank and be something the teacher’s would actually use. It is super cute!

Here’s my version of  Tip Junkie’s “You were MINT to teach”

1. Box of Altoids or your favorite mint.

2. Wrap in scrap booking paper

3. Take some card stock and print with a little thank you card  the says “You were MINT to teach”.

4. Dress it up. You can either get some ribbon and wrap around or a little bow. Haven’t dressed mine up yet that why there’s no pic of the completely finished product will add to post when it gets done.

There you go something relatively cheap to put together
that doesn’t take a lot of time and its something that will get some use.

Sorry about the pictures my photography skills are a work in progress.

Chocolate Nutella Mug Cake

First of all this recipe I’m going to warn you is an absolute sin because it is too easy to make and can get you in a lot of trouble. Number one it has Nutella in it and number two chocolate cake in a mug. What isn’t good that comes out of a mug right!

I found this on Pinterest and just had to try it one night when I had a chocolate craving. It is so simple to make and everyone has these ingredients in their pantry. The sinful part is that it is made in the microwave so it takes no time to make 5 minutes tops from getting and mixing the ingredients to cooking in the microwave. There are a couple of variations you can do as well nutella, peanut butter, almond butter, and chocolate. To me this cake has more of a consistency of a brownie so that makes it even more sinful.

from melskitchencafe.com

Chocolate Nutella Mug Cake

Serves 1-2

Ingredients

1/4 cup all-purpose flour

5 tablespoons sugar

2 tablespoons cocoa powder

1 egg

3 tablespoons vegetable oil

2 tablespoons semi sweet chocolate chips

1 tablespoon nutella (or peanut butter, or you can omit altogether if don’t have)

Dash of vanilla and salt

Directions:

Whisk all ingredients together in a large cocoa or coffee mug until smooth. Microwave cake on high until puffed, about 2 minutes, watching carefully as microwaves vary in strength. If desired, drizzle with chocolate syrup or hot fudge sauce on top. Add a scoop of ice cream and eat straight from the mug. Yum.

The Best Pizza Dough

I love Pizza especially homemade. Mainly because it taste way better than any chain, I know what’s in it, and I can control my ingredients. This is the best pizza dough recipe I’ve tried and I have tried a lot of dough recipes. It never comes out to sticky or to tough to work with it is the perfect consistency. It is now my go to recipe and has never failed me. I found this off Pinterest from www.laurenslatest.com

Basic Pizza Dough yield: 2-12 inch pizzas, approximately 1 lb. of dough Print This Recipe Print This Recipe

Ingredients: 1 cup warm water 2 1/4 teaspoons active dry yeast 1 tablespoon honey {or sugar} 2 teaspoons salt 2 tablespoons olive or canola oil 3 cups bread flour {give or take 1/2 cup…depending on the heat & humidity}

Directions: In a large mixing bowl, preferably that of a stand mixer, stir yeast and honey into warm water. Sit for 5-10 minutes or until bubbles form and mixture starts to foam. This tells you that the yeast is alive and kicking. Pour in salt, oil and half the flour and mix.

Once that flour is incorporated, start adding flour in bit by bit until you get the pizza dough to the consistency you want: slightly tacky, but when you touch it doesn’t stick to your hands.

Once you reach this stage, turn the mixer on high to knead for 6 minutes. Turn a timer on and walk away! Resist the temptation to stop earlier than 6 minutes! That seems to be the magical number. It should look something like this when it’s done! The dough should be smooth and easy to work with. And the bowl should be clean!

Lightly grease the bowl & the dough so it doesn’t dry out, cover with plastic wrap and let it rise 1-2 hours. That’s it!

Now you can turn this dough into anything your little heart desires.

If you go to her website she has pictures in case you’re a visual person. Hope you enjoy!


Chocolate Cobbler

After a month of fasting from sweets I went on a bing of chocolate and the Chocolate Cobbler was one of my favorites.

So for all you chocolate lovers out there….If you love chocolate, brownies, or anything chocolate and gooey this if for you. This is a pin I found on Pinterest I had to try it is a lovely,  gooey, chocolate, brownie like mess. It doesn’t look pretty but it sure taste good. It is super easy to make and homemade none of those hydrogenated oils ect.  I got this off www.beckybakes.net adapted from a Tasty Kitchen recipe.

Chocolate Cobbler

  • 1 cup all-purpose flour
  • 2 teaspoons baking powder
  • ¼ teaspoons salt
  • 7  tablespoons cocoa powder, divided
  • 1 ¼ cup sugar, divided
  • ½ cup milk
  • ⅓ cup melted butter (I used Unsalted)
  • 1 ½ teaspoon vanilla extract
  • ½ cup light brown sugar, packed
  • 1-½ cup hot tap water

Preheat oven to 350 degrees.

First stir together the flour, baking powder, salt, 3 tablespoons of the cocoa, and 3/4 cup of the white sugar. Reserve the remaining cocoa and sugar.

Stir in the milk, melted butter, and vanilla to the flour mixture. Mix until smooth.

Pour the mixture into an ungreased 8-inch baking dish.

In a separate small bowl, mix the remaining white sugar (1/2 cup), the brown sugar, and remaining 4 tablespoons of cocoa. Sprinkle this mixture evenly over the batter.

Pour the hot tap water over all. Do not stir!

Bake for about 40 minutes or until the center is set.

Let stand for a few minutes. Serve with homemade ice cream using the gooey sauce to spoon over all.

Happy Baking!

DIY Mod Podge Silhouette Canvas

After a bathroom remodel I needed a new piece of artwork for the now newly painted walls and I didn’t want to spend a fortune for a piece of art. So of course I was just starting to get the pinterest thing. I was like huh I just pinned something that would look great in my bathroom. A totally easy looking silhouette canvas. Here’s where I got the idea from http://tatertotsandjello.com/2011/07/summer-social-guest-project-make-mod.html . It is super easy and It looks professionally done. Who knew the most unartistic person could be an artist.

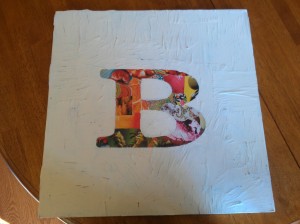
I luckily was able to get a coupon from JoAnn’s for the canvas a 3 pack for less the $20 bucks, a bottle of acrylic paint, and paint brushes. I spent less than $30 dollars and still have paint and two canvas left to paint. It did take some time……I did not have my kids cut pictures out so I did that work myself and a little trial and error about the puckering of the paper when I realized when it was done that is what gives the canvas character. All that worry for nothing. I did not do a bird cut out but a monogram of my first initial of my last name. It looks good plus its going in the bathroom so the B could be for bathroom as well. Ha ha.

Now all I have to do is get the husband to make a DIY Frame for my new piece of art since my canvas is not the normal shape now I know why they were on sale.  I’ll post that later when it actually gets done. His honey do list is a mile long. (Sorry the photo is not the greatest)